
When I say "Santa brought my kids" I meant my "Significant other" heard that this is "good for kids" and she bought it.
You know what this means. I have to learn all about it and then teach my kids.
So.
MicroBit is designed for kids by BBC in 2014 as part of their Make it Digital initiative.
Who are the main users?
Kids 11-12 y/o (Kids can start when they learn reading and writing 8y/o)
Advantages and disadvantages from the product perspective?
Advantages:
a perfect gadget for exploiting children's curious mind
an early start means kids will be "infected" with coding,
brain synapses will be developed at the right age, while still forming,
kids without STEM "talent" will unlock their power.
Disadvantages:
if not properly handled learning process can be boring after beginners' delight,
an early start means early dropout.
Why are people using it - what it is good for?
Scratch is used as starting tool, or toy for kids to begin with coding. It is designed to be an easy, fast way for kids to learn how to resolve a given problem. In the other words, kids learn algorithms.
How to create another product with the same functionalities?
Don't waste time! Just use it!
5 alternatives of the product
Basic user manual
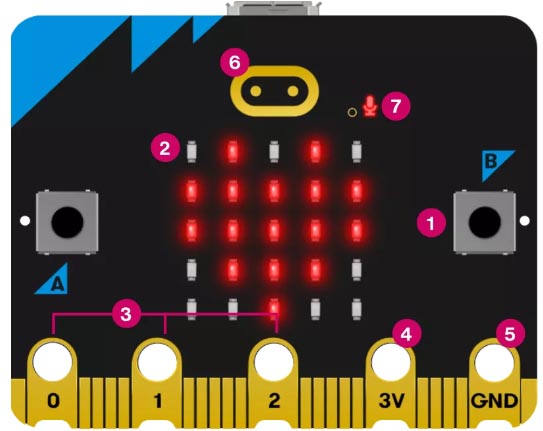
MicroBit is a small board with:
2 buttons (A, B), 5 pins and
a set of LED lights on one side.
GPIO pins to connect headphones and other electronic devices
3V pin
ground pin - GND
touch logo which is a touch sensor
microphone LED
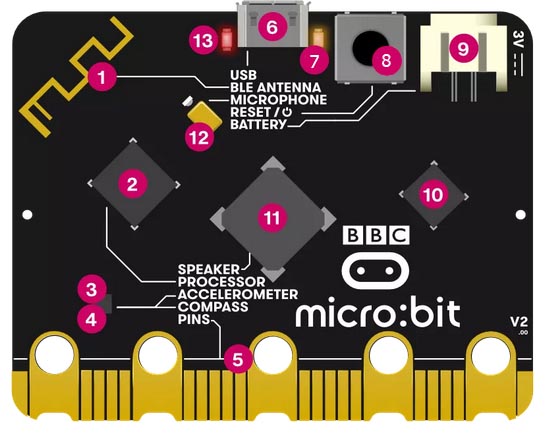
On the other side, there are:
BLE antenna - radio and Bluetooth
processor
compass
accelerometer
pins
MicroUSB cable socket
single yellow LED
reset and power button
battery socket
USB interface chip
speaker
microphone
red power LED
Power up
The battery case has 2 AAA batteries and a cable with a jack which is plugged into a socket on the MicroBit board.
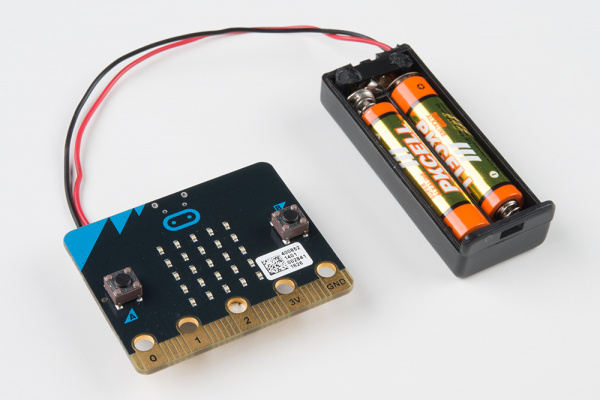
When the battery is plugged in for the first time MicroBit starts a set of commands on LED light when followed starts the initiation of MicroBit.
PRESS buttons A and B,
SHAKE,
TILT,
CLAP 5 times,
CONNECT MicroUSB cable and
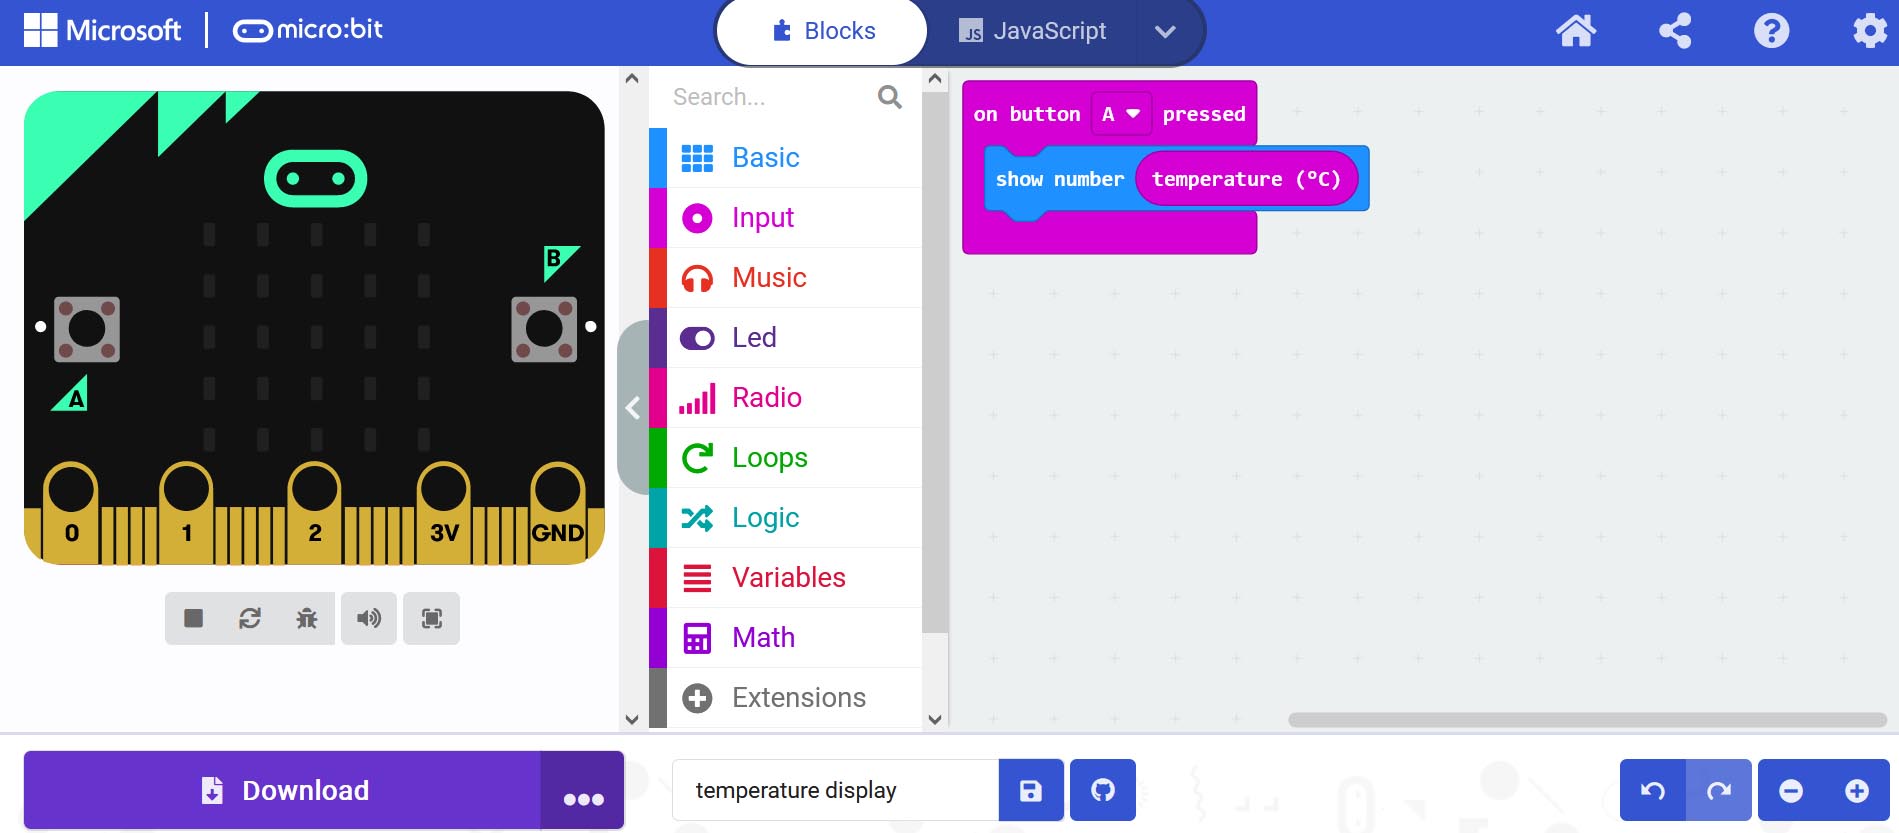
CODE in MakeCode.
Advanced user techniques - some options that are not easily visible
There are thousands of advanced projects out there but I choose dice.
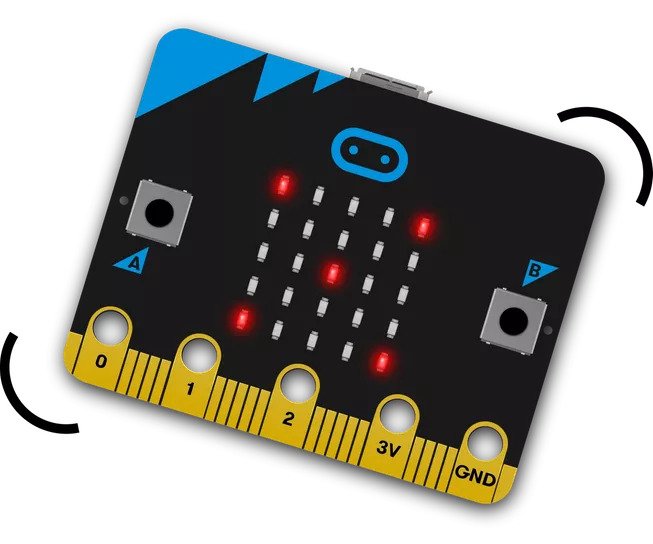
It works very easily actually. When you shake the micro:bit on the LED display instead of the number you get a light image shoving your number.
- Assemble it
What do you need?
micro:bit (or MakeCode simulator)
MakeCode or Python editor
battery pack (optional)
- Code it

- Improve it
Make the image disappear after a few seconds in order to save batteries.


